

Do it Your Self Chimney Repair With Stainless Steel Chimney Liner
Many municipalities require an inspection prior to the sale of a home. Chimney repairs are often one of the results from the inspections. When it comes to the chimney, there can be an unexpected expense you will need to take care of to close the sale. At the least, many have to install a chimney cap. The worse case scenario can be the need for a total chimney reline because the original liner is cracked.
The cost of chimney repair on a one story house can start at around $1500 and run up into the $2000 range. But wait, there is good news.
For the cost of the materials and shipping, you can install it yourself for between $500 and $700. Even with no experience many can install them in under four hours. There are of course exceptions but in many instances, chimneys can be done by homeowners.
So, why do the chimney people get so much money. Although there are numerous reasons, chimney building and repair is a highly specialized trade. Using newer technology and longer lasting materials, it is now possible for homeowners to do the DIY chimney repair and save.
If you are handy, if you can work off a ladder and have a helper available, then you may be able to install it yourself.
How To Install A Chimney Liner
If you prefer videos, there is an instructional video on chimney repair. It is available from the company that sells the materials. It is the same video used to train professionals.
What You Need
Gloves (there are sharp edges on some of the materials)
Hack saw
Metal cutting shears (If you are borrowing, try to get right and left handed cutters)
Ladder
One to two helpers depending on the height
A rope several feet longer than the chimney
Mill file (to file off sharp burrs)
A tub of refractory cement
Small trowel or putty knife
Paper towels to clean putty knife
First you will turn off the furnace and disconnect the flue liner from the chimney.
It is always a good idea to inspect and clean the chimney before putting the new liner in. The tools can be purchased or even rented in most localities.
Once cleaned out you are good to begin your chimney repair.
Preparing For Liner Installation
With glove on, remove the liner from the packing materials and straighten it out.
Usually the driveway works good for this. One word of caution, park your car in front of the drive so that someone does not drive onto your new liner. It is remarkably tough but not so tough that a car can drive over it with out damaging it.
On the end that will be the bottom, attach the bottom Tee connector. This it tightened with a pipe clamp screw that is a fixed part of the tee. Tighten it a bit more than sung but be careful not to over tighten. This is necessary for the next step.
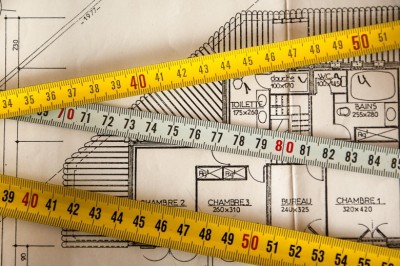
Measure the length the liner will need to be. This will be accomplished with your helper. One person on the inside and at the bottom of the chimney will hold the tape. Measuring from where the bottom of the liner will be on completion, hold the tape while the measurement is taken.
With that measurement and your new liner laying flat, you will be able to measure and ensure that it is the right length. You will not cut it yet. This will happen when the bottom is installed and the liner is hooked up to the heater.
The Installation
Start introducing the bottom end of the liner assembly into the chimney. Use care to keep the liner centered in the chimney opening. This is to keep from causing damage to the insulation or liner. This is assuming that there are no loose brick or block at the top of the chimney. If so, they will also need to be repaired before proceeding.
Some times a rope will be needed to pull the liner into the chimney. Either attach the rope to the bottom end or you will have to purchase a cone to tie the pipe to. How will you know if this applies to you?
Two situations almost always will require this added step. Really high chimneys and corbelled chimneys. This is a chimney that goes straight up until the attic where it goes on an angle to exit the center of the roof line. The helper will pull as you feed the pipe from the top.
Once the chimney liner is being fed down from top, the helper will need to make sure it threads through the stainless steel pipe clamp that makes up the snoot. This is the part that goes through the thimble or where the thimble would be. It may help to gently bend the clamp to help it receive the pipe through is easier.
Once the bottom is in place (it will align with the opening where the furnace will attach to it), the top can be cut. Depending on how the crown will sit on the top, allow four inches extra to fit inside the crown.
Only after the bottom installation is completed should this next step be taken. With a pair of aviation cutters or tin snips cut the top to the appropriate length. It is important that there are no sharp or jagged edges.
The Crowning Moment: Topping it Off
Once the bottom of the chimney repair is completed, it is time to climb back to the top.
To install the top plate, put a thick bead of silicone caulk around the chimney crown or at the top of the terra-cotta flu tile. The top plate now goes over the liner and gets pressed into the silicone to make a tight seal.
The attached stainless steel hose clamp gets tightened to secure the chimney liner into the top plate. There were four optional pre-drilled holes allowing the cap to be installed using tap-con screws to affix the cap.
Put the cap on and tighten the hose clamp and you are done on the top side.
At the bottom, it will be necessary to cut through the insulation (if you insulated it.)
Then the piece that goes from the liner to the furnace needs to proceed through the thimble or hole between the wall and the chimney.
Secure it with the pipe clamp. This wraps around the back of the back side of the Tee part of the chimney liner. It holds this piece in place. Fill the any holes with refractory cement.
Connect your furnace according to your local codes and if it is the season, turn on the furnace. Your do it yourself chimney repair has just saved you hundreds if not a few thousand dollars.
Your not done yet.
Now, depending on your taste and choice, buy either a bottle of bubbly or sparkling apple juice and celebrate. You just saved at the minimum, $1000 dollars and possibly even more on this do it yourself chimney repair.
Jonathan Steele, master of several trades is a stone mason, consultant to the trades and public speaker. Having used traditional systems, he now advocates and lectures on stainless steel chimney liners.
Jonathan also speaks, writes and teaches classes on health care issues and How to Build a Successful Internet Based Business
Find other topics by Jonathan Steele at Speechmastery.com